Creating the Studio/Workshop Interior - phase three and 1/2

Ater the cabinets and counters we moved on to the light fixtures and plumbing.


By now it is mid January and the trim work around the doors and windows are completed.


We installed pine laminate in my office to match the cabinets and carpet in the main studio area.


The carpet installers came February 13-14 and they were the last contractor on the schedule. Time to move in and finish the detail work!!

Creating the Studio/Workshop Interior - phase three


Time to start painting and getting the interior finished out. After drywall the carpenters showed up to finish out the cabinets, workbenches and shelves.

We installed pine cabinets with laminate countertops for more storage.

D.O.G. likes to hang out in the studio and inspect all of the work - he really likes the new space.

Creating the Studio/Workshop Interior - phase two


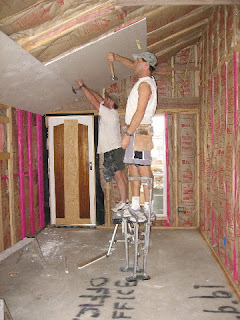
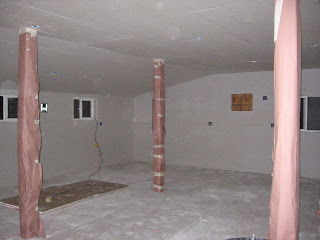
After the doors go up we had the sheetrock team and drywall mud experts come in and do their stuff - they had the place covered up, floated and taped within two weeks - by now it's mid December and the weather outside is cold and wet. We set up space heaters for the workers and to help the paint dry. The drywall really brought the view of the space to reality - we are so excited!!


These guys make it look way too easy - we really appreciated thier hard work.

Creating the Studio/Workshop Interior - phase one

After transforming the exterior of the workshop - we moved to the interior and began the work to turn this once garage/barn into a glass art studio.

The original owner was the driver for the Pearl Beer Distributor and this building was originally used to park and store the Pearl Beer Trucks.


We divided the space into three areas: first is a two car garage space that has Robbie's work benches, tools and wood working equipment, the second is an office space for me and my glass design work, the third is the actual glass art studio and work space.


After the space was divided, we began the reinforcing of the original walls and adding doors and windows to bring in more natural light.


After the studs and windows we started on the electrical phase - we added a 200 amp service for all of the power requirements and with all of the outlets and breakers we must have 2 miles of wiring - it is everywhere, but you can never have too much power!!


Transformation Photos of Barn to Workshop


Spring of 2005......


Before

Jesse helps summer 2006

David helps summer 2007


Overhead Door Co

Markert Construction


After


.....October 2007


Transformation… Barn to Workshop

It all started with a dirt floor, three walls and a leaky roof.
( We are conquering leaky roofs one at a time)

**Note: The transformation of the “barn” began three years ago.


Step 1: Remove all debris including scrap wood, scrap metal, car parts, mower parts, animal nests and other miscellaneous goodies left by former occupants.

Step 2: Order dirt to fill in the three-foot deep hole in the NW corner of the interior and eliminate the standing water. Stand back and watch the dirt contractor sink his “bobcat” into the mud and then wait several days for the mud to dry before towing it out and finishing the dirt work.

Step 3: Contract with concrete company to poor interior slab.


Step 4: Contract good helper to assist in hanging temporary doors and walls to “dry in” the rest of the barn.


Step 5: Identify your obstacles and deal with them accordingly.


Step 6: Get a sketch, blueprints, or doodle something on a bar napkin – you need a plan.


Step 7: Hire good, skilled, knowledgeable contractors and stay out of their way.

Step 8: Repeat step 5 and modify step 6 as needed – “revision” is not just another pretty word.

Step 9: Repeat step 7 ( and keep your hired help happy)


Step 10: Repeat step 8 until you can manage the rest yourself and be glad you are not to stubborn to use steps 5-7 - then you can sit back and relax.


**See note above**

Remodel and Recovery


Wow - its been too long between posts and time to catch up! Repair on the house began in June 2007 and continued through November - just working on the exterior.


It all started because we needed a new roof. Small hole = big problem - so we needed to replace the rotton wood decking and fascia and soffit - so while the carpenter is here - also replace the rotton wood around all of the windows and doors, and while your at it - replace the rotton doors. Whew!


Long journey to new roof has begun. Now that the new wood is in place better get some paint on it.....
Roof company also installs gutters -
What color do you want??
Need to know that before we paint. After three trips to the hardware store we finally found the right shade of brown.

So we paint - the exterior trim and windows.

Did we mention there are 36 windows?


Also need to choose shingle color - journey to new roof continues. In the mean while new doors are installed. Also found some craftsman style lanterns for the front entry.

And after much deliberation on which shade of brown we wanted for the paint, gutters and shingles and a three month waiting period for the roofers - we started to get a roof and the sky turns dark and it looks like rain - and the race is on...

But wait -


- the old shingles are gone - the rain held off and the new shingles went on - and the house had a new roof. Yeah! No more leaks and no more buckets in the house to catch rain water......-
......and the peasants rejoiced!


We decided to keep the exsisting lightening rods and cable that where original to the house but we added some decorative glass-ball-rods to the front and rear of the house just to keep a bit of character.


The painting continued for several more weeks -
Did we mention the 36 windows?
By Thanksgiving we had the main house exterior complete
and we were indeed giving thanks!